Table of Contents
- Who is this for?
- Use cases
- Prerequisites
- What are we going to do?
- VPS install
- Router installation
- Configuring nginx-proxy-manager
- FAQ
My rough and DRAFT - remote management guide…
Who is this for?
- Do you have a hotspot / miner / rig at a remote location?
- Do you want to access your remote infrastructure as if it is on your own network in a secure manner? ie. https://myrig.mydomain.com ?
- Do you need special routing because of CG-NAT or port forwarding reasons?
NOTE: This is ONLY a guide which uses cheap gear, it is not the best or only way to do this task, however I suspect this is a good middle-ground in getting peeps running this kind of setup with minimal network & Linux experience - if ANYTHING is unclear and you need more verbage to explain a particular step/task give a shout!
Use cases
Some real world examples of what you can do when you manage infrastructure remotely,
- Turning remote kit on/off when it becomes problematic
- Ensuring your kit is online/offline (ping)
- Accessing miner/etc dashboards and management interfaces
- Helium/other mining being CG-NAT’d and needing to fix relaying
- Routing all internet-bound traffic via a VPN rather than over the remote hosts network
Prerequisites
- Mango gl.inet - is used in the examples below but there are plenty of alternatives
- Linux based VPS with root access and its own external IP - or any ‘server’ which will run your VPN server software, this does not need to be Linux however will be used in the examples below. In our example we will use a Ubuntu/Debian based Linux VPS.
- A domain name and ability to add/remove/modify DNS records, we will use this for secure access
- A laptop/machine/phone to either connect to the LAN port or WiFi of the Gl.Inet
- Ability to create/edit files on Linux-like operating systems, happy to link to guides if required
- Time & a bit of willingness for adventure

NOTE: If your intention is to expand this to several hosts over time, consider getting a VPS service which lets you buy extra IP’s, this means you do not have to have several VPS’s setup (one for each host), especially worth considering in CG-NAT cases
What are we going to do?
- We will install VPN software on our VPS server, this is for the gl.inet (and ourselves) to connect to it in a secure manner
- We do a initial setup on the gl-inet
- We setup VPN access on the gl-inet towards the VPN server
- We therefore assume a typical network setup:

– Your host has a normal consumer router
– You plug your Gl.Inet into one of the free pors of the customer’s router and plug it into the GL.Inet’s WAN port (we will cover using WiFi instead at some later date)
– You plug your hosted equipment into the LAN port of the GL.Inet (you can use a switch for more physical ports if you want)
– Therefore your host cannot access your equipment directly, as they will ‘hit’ your router
– You can however access YOUR equipment or the host’s via the VPN as required
VPS install
Get your VPS up and running, with root access to it.
A good/cheap deal is usually available from https://www.racknerd.com
Initial Packages
In our example, we will be installing Wireguard on our VPS server. This can also be OpenVPN, we choose Wireguard since it’s easy to setup and performs better than OpenVPN.
First we update the software repository and then install some software to get us going, including docker, I am assuming you are logged in as root:
# apt-get update && apt-get -y install docker.io telnet curl
DNS Configuration
Next - lets confirm the IP address of your server, you might already know this (to access the VPS), if not, you can confirm by running:
# curl --insecure https://whatismyip.akamai.com/ ; echo
111.222.111.1
If you have access to a domain name, add a DNS ‘A record’ or ‘host record’ - we will call it wireguard.mydomain.com = 111.222.111.1 (using the example above)
It is encouraged to go to your DNS host’s page and add a wildcard (’*’) record to point to wireguard.mydomain.com
This will ensure that abc123.mydomain.com points to wireguard.mydomain.com (which in turn points to your VPS’s IP address) as we did with the initial VPS setup steps
Wireguard & Nginx-proxy-manager installation
Now let’s add a user for running wireguard and get the UID it runs as:
# useradd wireguard
# id wireguard
uid=1001(wireguard) gid=1001(wireguard) groups=1001(wireguard)
In the above example, the wireguard UID is 1001.
Next - let’s make a directory for Wireguard’s docker container to store its configuration in:
# mkdir -p /docker/wireguard/config /docker/nginx-proxy-manager/init
Now make a file called /docker/nginx-proxy-manager/init/03-routing and put this in there:
#!/usr/bin/with-contenv bash
#

if [ ! -e /root/.installed ] ; then
  apt-get update && apt-get -y install iputils-ping net-tools
  touch /root/.installed
fi

/sbin/route add -net 10.100.10.0 netmask 255.255.255.0 gw wireguard
/sbin/route add -net 192.168.8.0 netmask 255.255.255.0 gw wireguard
Then run:
# chmod +x /docker/nginx-proxy-manager/init/03-routing
This does the following:
- When nginx-proxy-manager starts up it will route all wireguard vpn traffic on the 10.100.10.0/24 network to the wireguard docker container
- When ngint-pxoy-manager tries to contact your wireguard VPN connection with clients on the 192.168.8.0/24 network it will route it via the wireguard container
- Marks the file as executable
Now let’s install a known version of docker-compose:
# curl -L https://github.com/docker/compose/releases/download/v2.2.3/docker-compose-`uname -s`-`uname -m` -o /usr/local/bin/docker-compose
Make it executable with:
# chmod +x /usr/local/bin/docker-compose
Now let’s create a docker-compose file, create a file called /docker/docker-compose.yaml and put this in it:
version: '3.4'
services:
  wireguard:
    image: linuxserver/wireguard
    container_name: wireguard
    hostname: wireguard
    networks:
      - proxynet
    cap_add:
      - NET_ADMIN
      - SYS_MODULE
    environment:
      - PUID=1001
      - PGID=1001
      - PEERS=vpnminer01
      - PEERSDNS=auto
      - TZ=Europe/London
      - SERVERURL=wireguard.mydomain.com
      - SERVERPORT=51820 #optional
      - INTERNAL_SUBNET=10.100.10.0 #optional
    volumes:
      - /docker/wireguard/config:/config
      - /lib/modules:/lib/modules
    ports:
      - 51820:51820/udp
    sysctls:
      - net.ipv4.conf.all.src_valid_mark=1
    restart: unless-stopped

  nginx-proxy-manager:
    container_name: nginx-proxy-manager
    image: jc21/nginx-proxy-manager:latest
    restart: unless-stopped
    cap_add:
      - NET_ADMIN
      - SYS_MODULE
    networks:
     - proxynet
    depends_on:
      - wireguard
    ports:
      - 80:80
      - 443:443
      - 9099:81 # Admin Web Port
    volumes:
      - /docker/nginx-proxy-manager/data:/data
      - /docker/nginx-proxy-manager/letsencrypt:/etc/letsencrypt
      - type: bind
        source: /docker/nginx-proxy-manager/init/03-routing
        target: /etc/cont-init.d/03-routing

networks:
  proxynet:
    name: custom_network
To note in the above:
- Replace wireguard.mydomain.com with your DNS name you created OR the external IP address of the VPS.
- Replace PUID and PGID with the UID values as discussed earlier. This is so that the container runs as the ‘wireguard’ user for security purposes
- INTERNAL_SUBNET would be the network your Wireguard VPN will create, in our example it is 10.10.10.0/24 which should be a ‘free’ network for anybody reading this.
- PEERS=vpnminer01 means we will pre-configure this Wireguard installation with one VPN client called ‘vpnminer01’ - this automatically generates the server and client’s secure keys for us so we don’t have to do this manually later - for now just keep in mind that our first VPN client will be called vpnminer01
Now let’s create and start the wireguard and nginx-proxy-manager containers:
# docker-compose -f /docker/docker-compose.yaml up -d
It should pull down the necessary image and create your docker container running Wireguard
Once done, let’s confirm it is up and running
# docker ps
CONTAINER ID   IMAGE                                            COMMAND                  CREATED         STATUS                  PORTS                                                                              NAMES
8ab71814158c   linuxserver/wireguard                            "/init"                  10 seconds ago   Up 8 seconds            0.0.0.0:51820->51820/udp                                                           wireguard
c22d6be8b16b   jc21/nginx-proxy-manager:latest                  "/init"                  10 hours ago   Up 10 hours                             0.0.0.0:80->80/tcp, 0.0.0.0:443->443/tcp, 0.0.0.0:9099->81/tcp   nginx-proxy-manager
If something like the above is displayed all is well, we now have Wireguard & Nginx-proxy-manager running!
Lastly lets edit the Wireguard configuration file which was just automatically created, edit /docker/wireguard/config/wg0.conf
The last line of the file should read:
AllowedIPs = 10.100.10.2/32
Change this to:
AllowedIPs = 10.100.10.2/32, 192.168.8.0/24
NOTE: This ensures that 'vpnminer01’s network ALSO routes the 192.168.8.0/24 network - this means that any device on the LAN port (or Wifi) of the Gl.Inet will be ‘visible’ from your VPS
Restart your docker container so it picks up this change with:
# docker restart wireguard
Now on to the Gl.Inet…
Router installation
Assuming you have a brand new gl.inet, you would plug the ‘WAN’ port into the host’s ‘LAN’ port. (We can cover Wifi at some later stage).
You can then proceed to plug your hosted equipment into the ‘LAN’ port of the GL.Inet - note - you can add a switch if you need more physical ports.
You can then plug in a laptop/yourself into the ‘LAN’ port as well, or simply join the Gl.Inet SSID to start configuring the router (the SSID & password is printed on the bottom of the device).
Browse to http://192.168.8.1 - the default IP address of the Gl.inet you are greeted with:
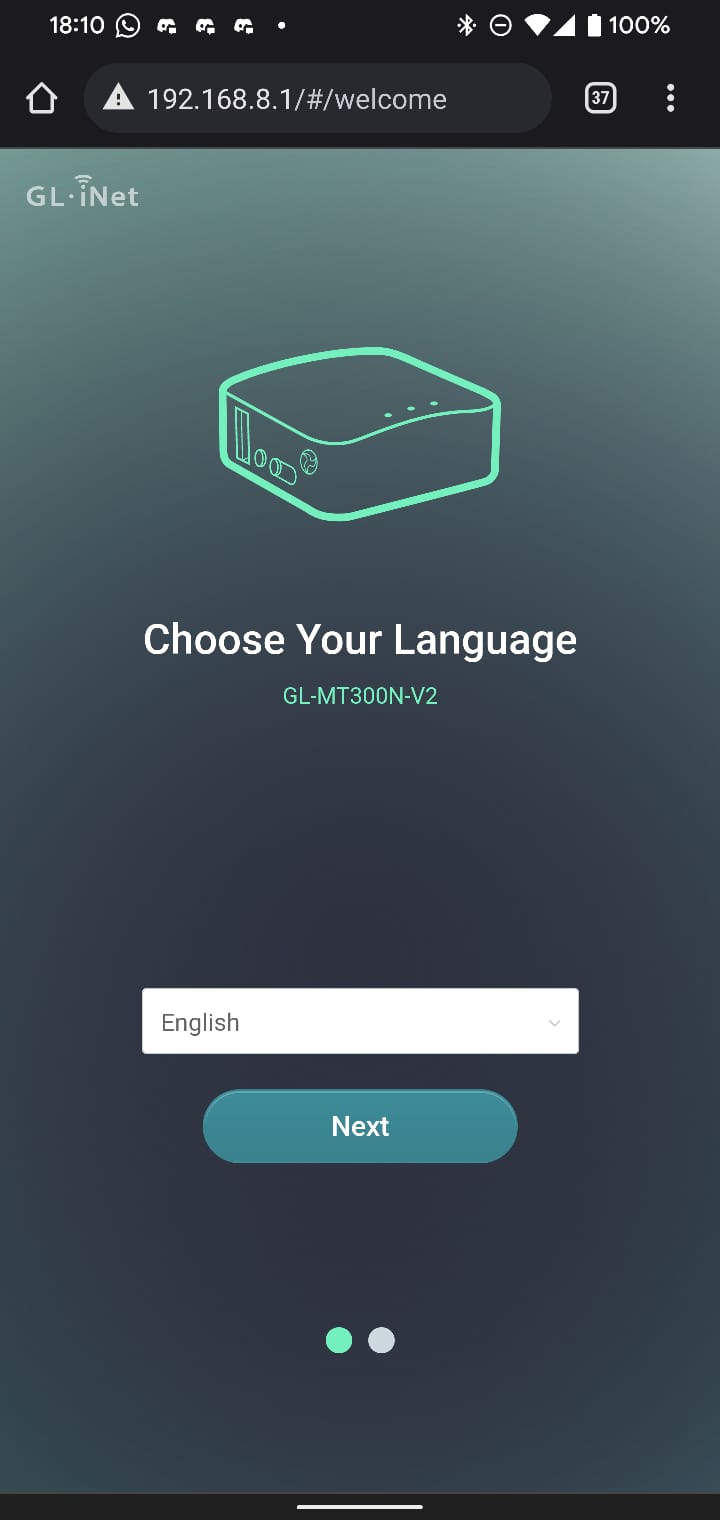
Choose your language and next.
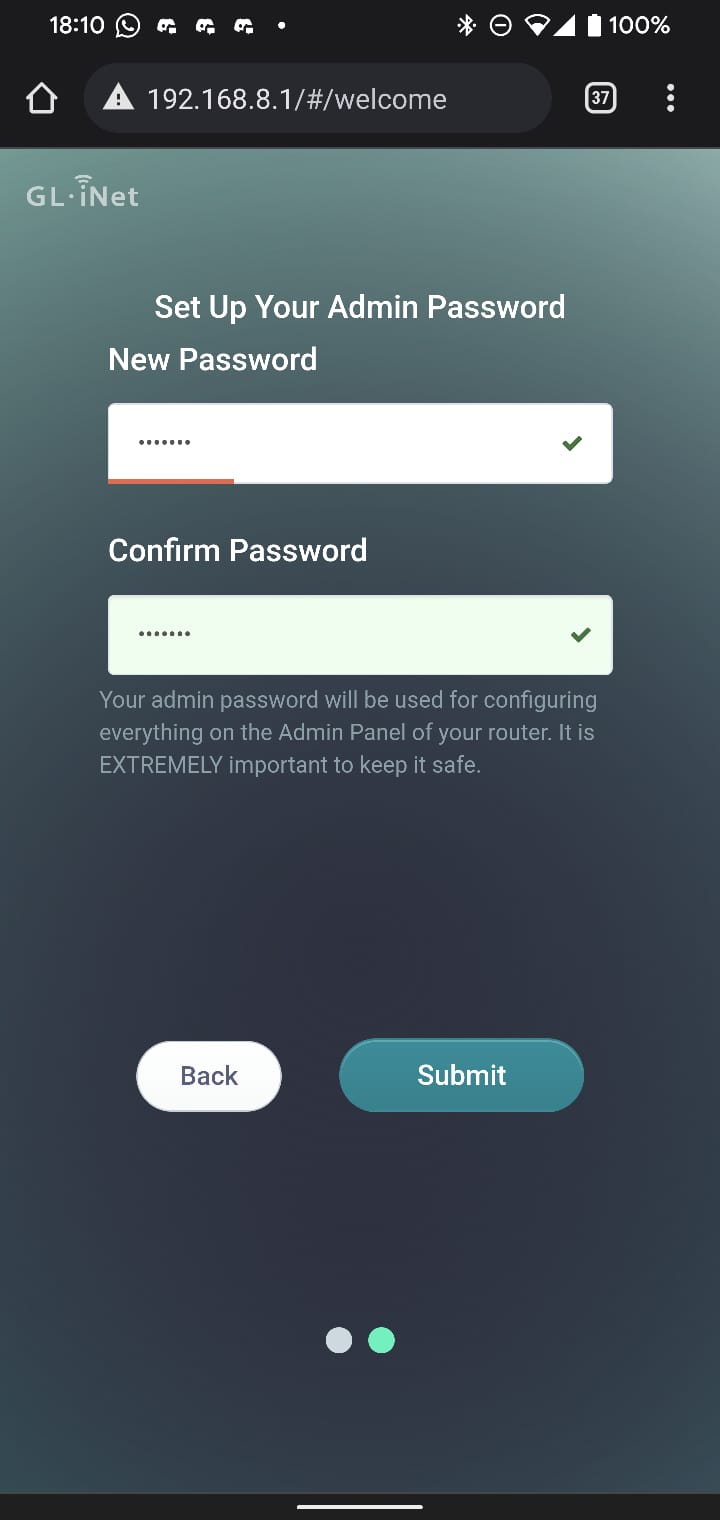
Then you get tho choose your password:
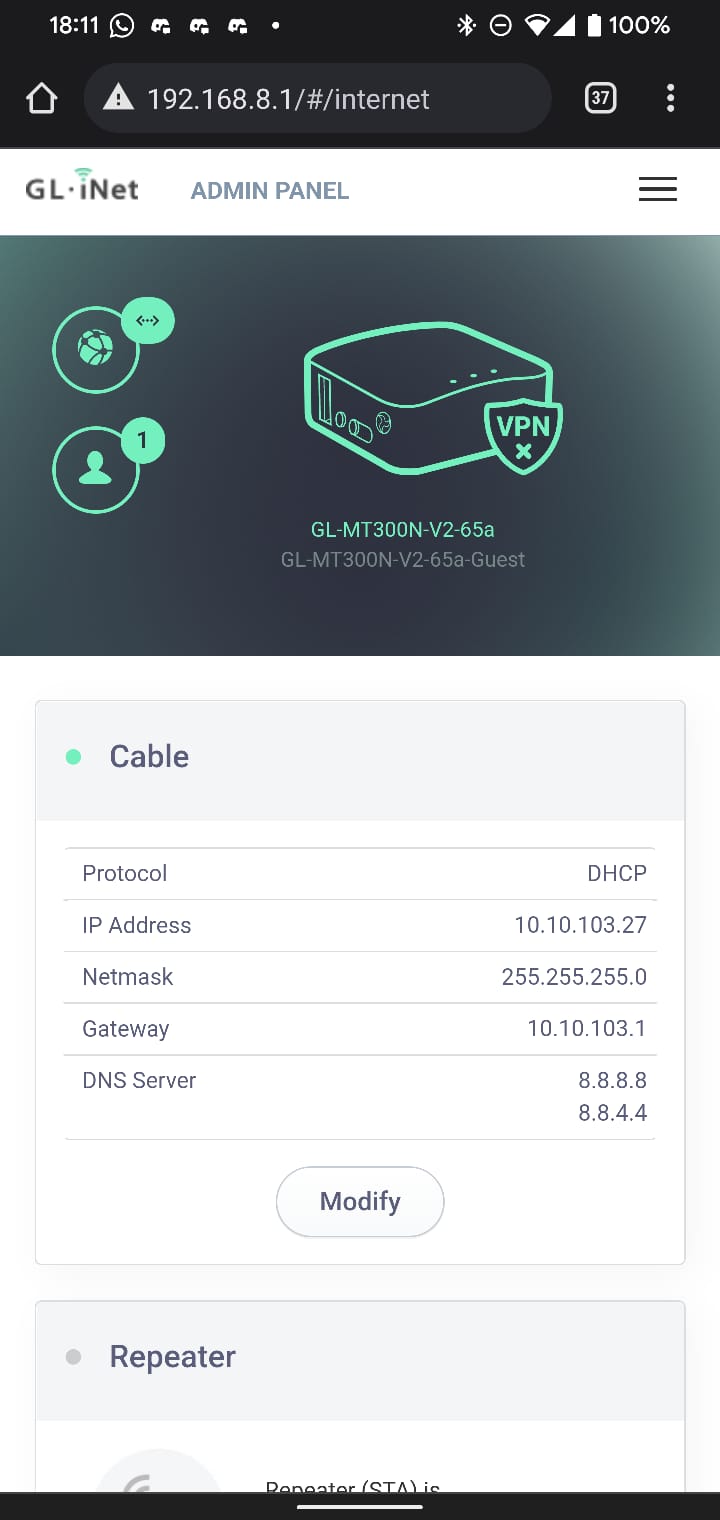
Your gl.inet is now on the network and ccessable - you will see something like this:
Firmware update
Now click on the ‘Upgrade’ window (top right list menu → upgrade if on mobile) - at first it might look like this:
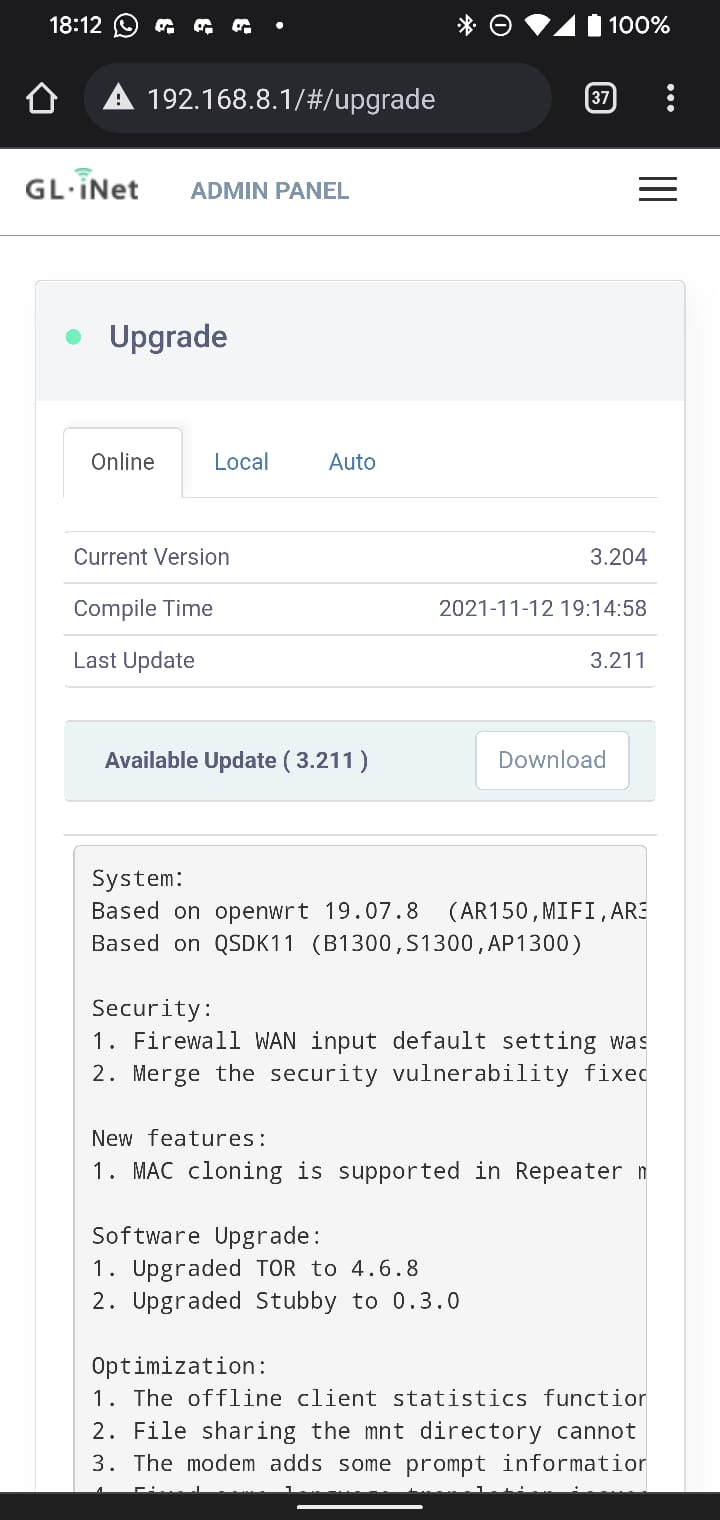
But after a while (30mins) it might offer up a new firmware image:
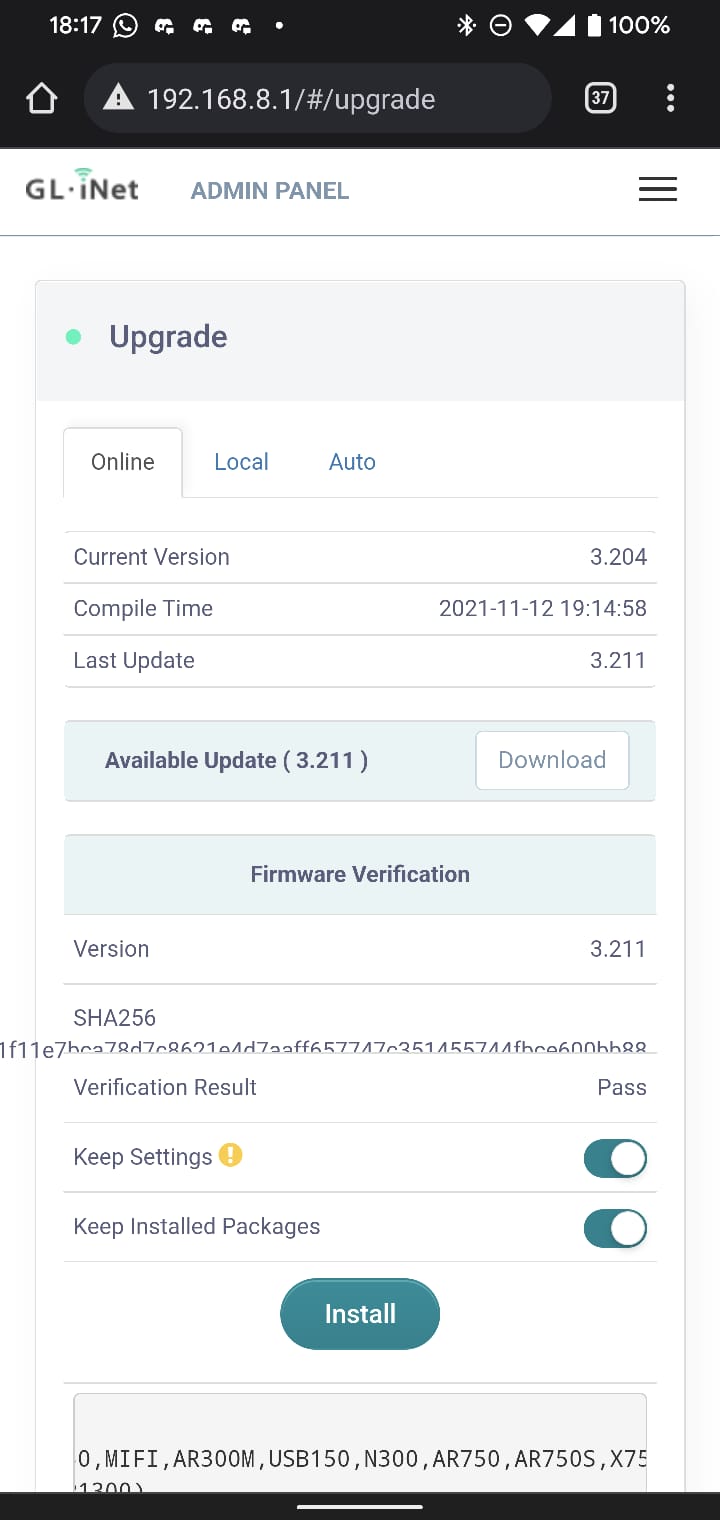
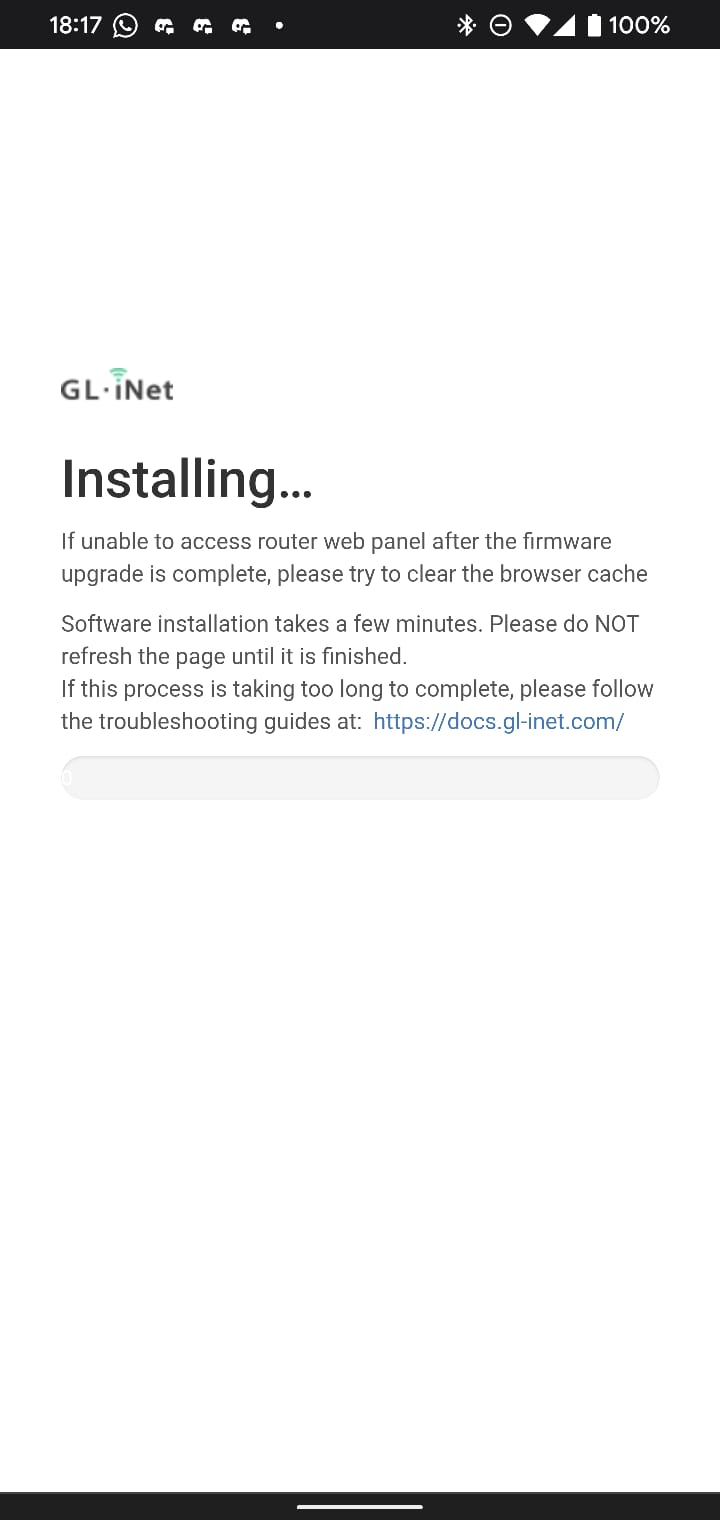
Hit the button and it should start installing the update:
Wifi Setup
You may or may not want to enable Wifi for the Gl.Inet
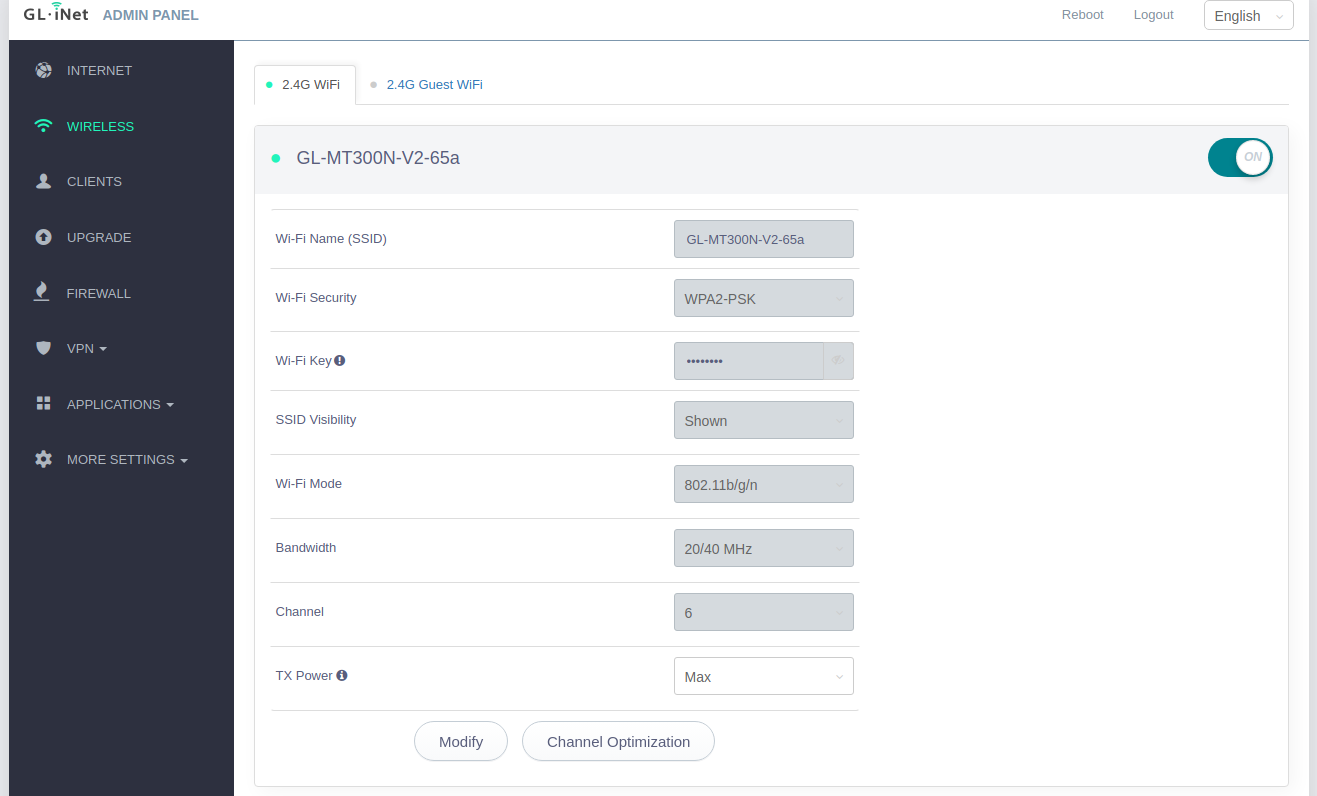
Browse to http://192.168.8.1 and login - on the left hand panel choose ‘Wireless’ and ensure you are on the ‘2.4G WiFi’ tab.
Here you can disable/enable wifi, change the SSID and password as you wish
Wireguard client setup
Now it is time to configure your VPN access to the VPS we have already setup!
Login to http://192.168.8.1 and on the left panel choose VPN → Wireguard Client:
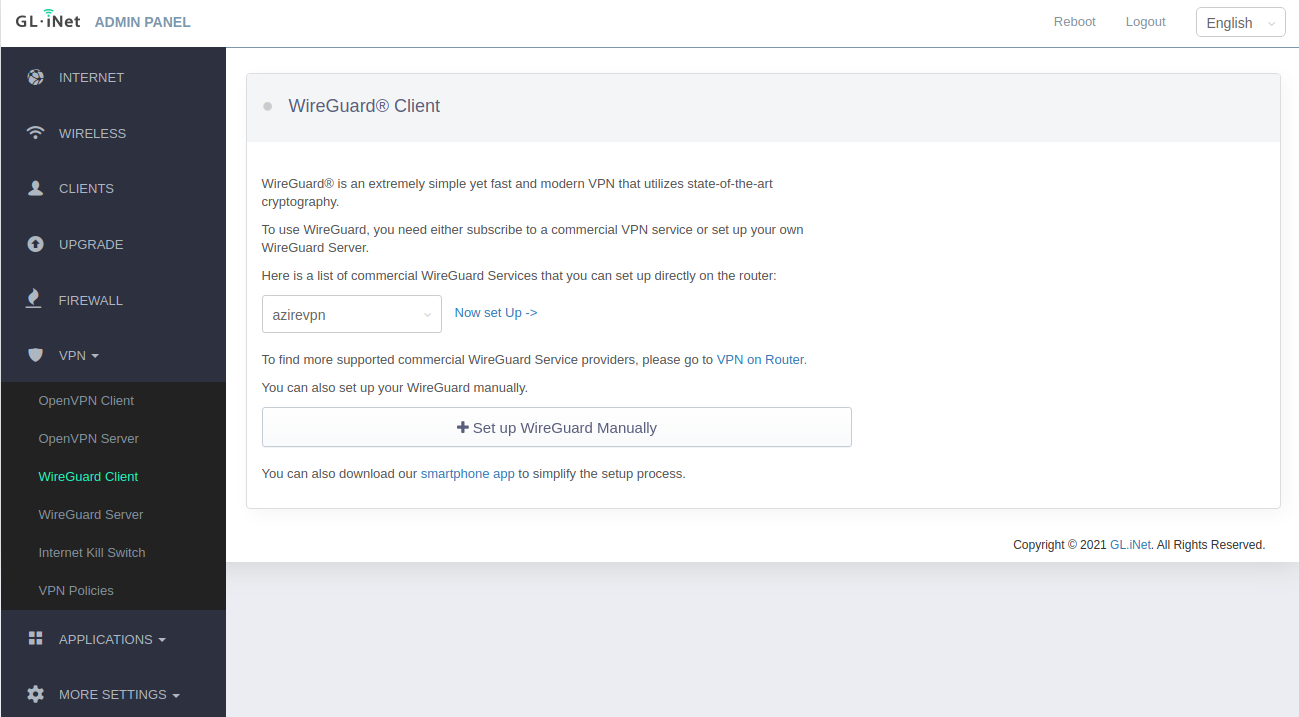
Click on ‘Set up WireGuard Manually’, and click on the ‘Configuration’ tab:
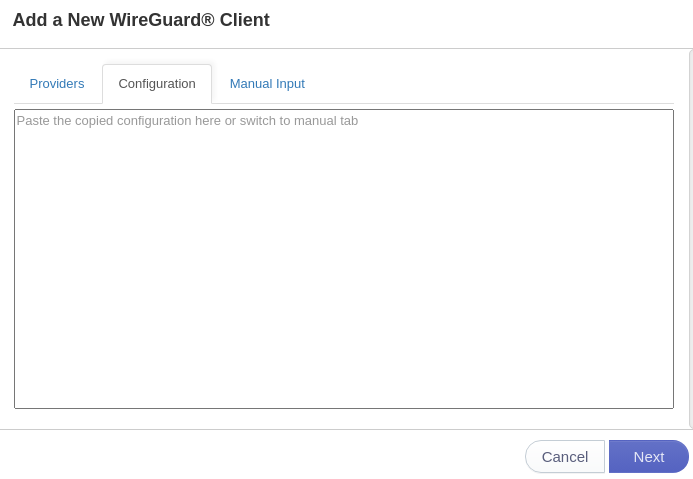
On your VPS, run the following command as root:
# cat /docker/wireguard/config/peer_vpnminer01/peer_vpnminer01.conf
Paste the output of that into your browser for the Wireguard configuration
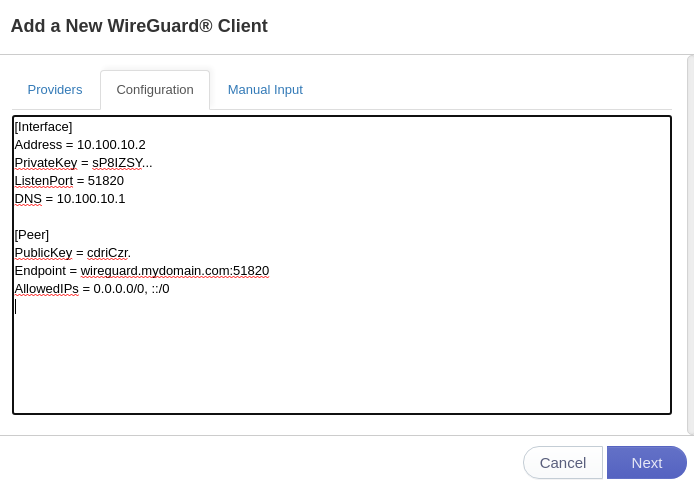
You will then get:
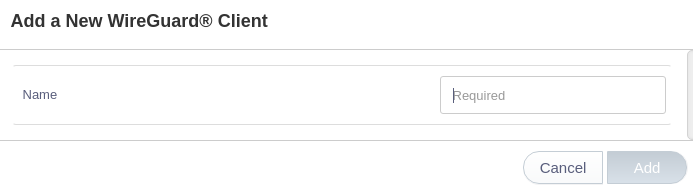
Give your VPN a friendly name.
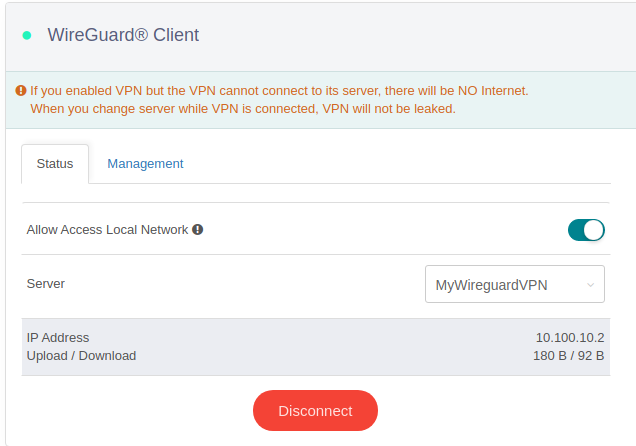
You will be greeted with:
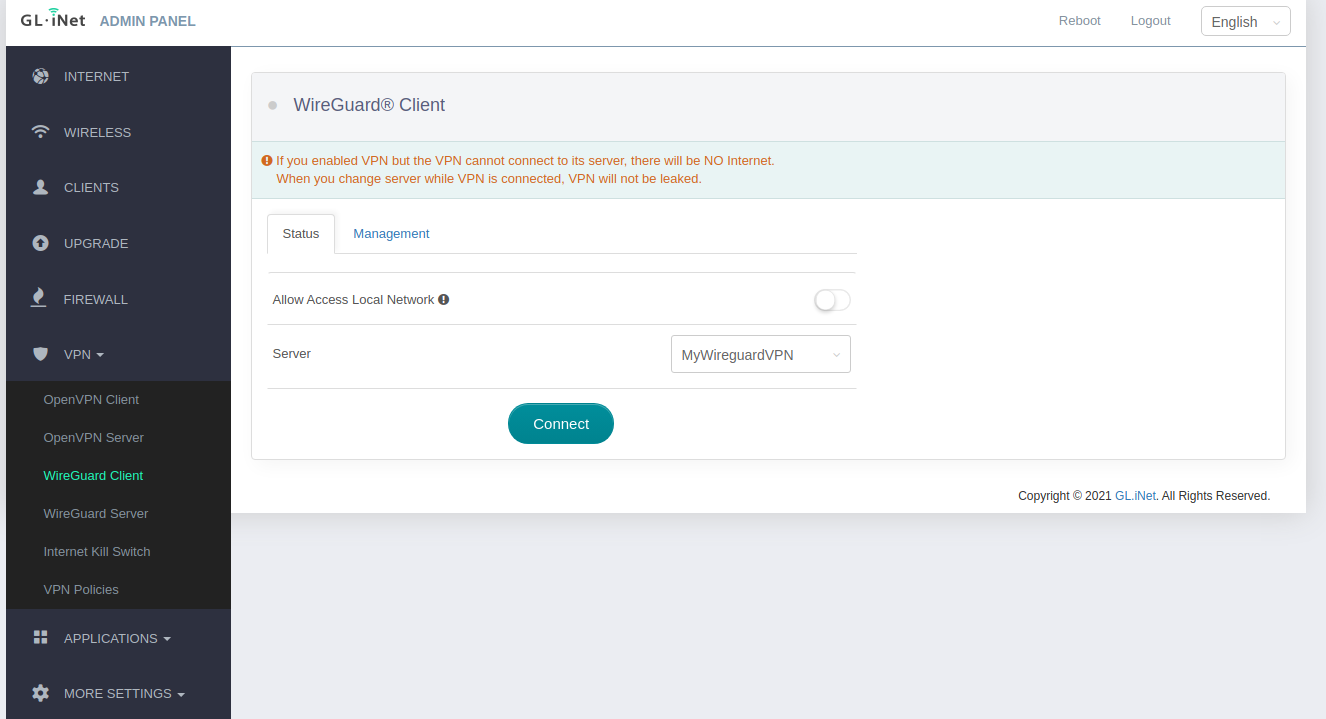
Do the following:
- Slide the tab to ‘Allow Access Local Network’ - this is so we can see our equipment on the LAN interface of the GL.Inet. Confirm the warning box
- Click on ‘Connect’
After ~30 seconds or so you should see that it has connected by showing the IP address and ‘Upload/Download’
You can confirm this on your VPS by running:
# docker exec -it wireguard ping 10.100.10.2
Output should look like this:
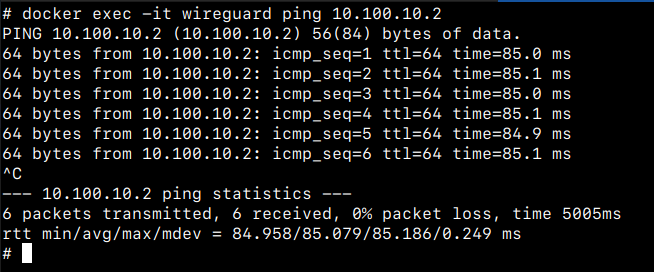
Hit Ctrl-C or Cmd-C to quit
NOTE: If you run into issues at this point you have a connectivity issue - or wireguard client/server issue - figure it out
NOTE: At this point, any Wifi or LAN client plugged into the GL.Inet WILL go through the VPN connection and exit via the VPS - and NOT through the host’s Internet. We can change this by using the VPN policy later, see where we setup a new miner further down if you want to do that.
Configuring nginx-proxy-manager
Now for the cool stuff - let’s discuss what nginx-proxy-manager is first,
Nginx-proxy-manager is known as a ‘reverse proxy’ and will sit and listen for connections on your VPS and based on the content asked for, then forward it to the destination you want to send it to via the VPN connection.
This part will assume you managed your ‘domain name’ settings mentioned in the VPS section
First let’s configure nginx-proxy-manager, it will be avaiable on http://wireguard.mydomain.com:9099/
You will be greeted by this screen:
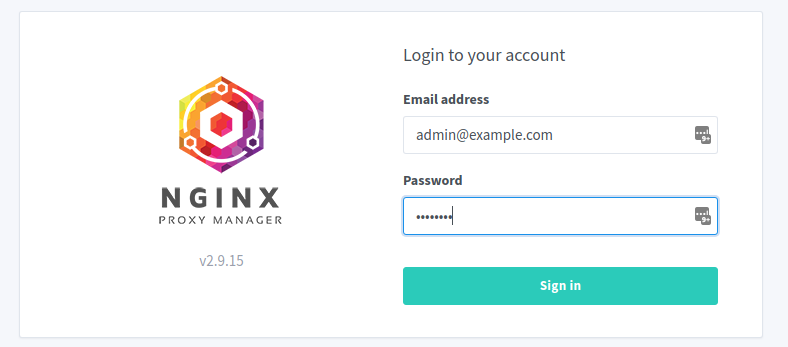
The default username is: admin@example.com and password is ‘changeme’
You then see:
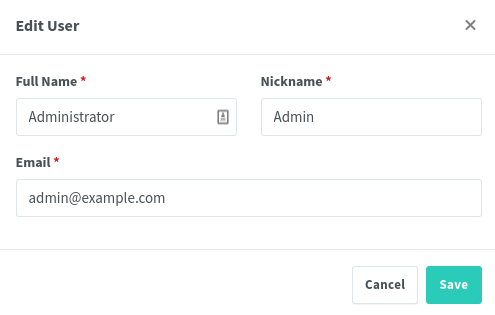
You need to change at least the email address but of course can also change your Name and Nickname here then click ‘Save’ to continue
Next you see:
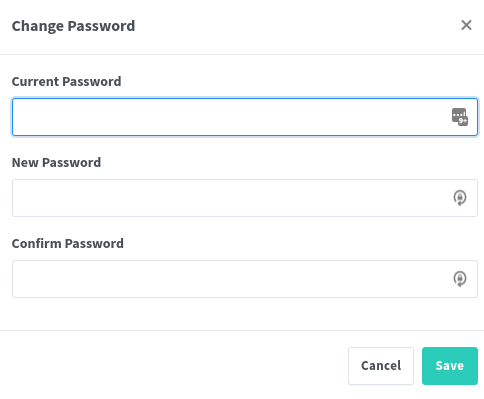
Type in the current password (‘changeme’) and enter a new password and click ‘Save’ to continue
You should then be greeted with:
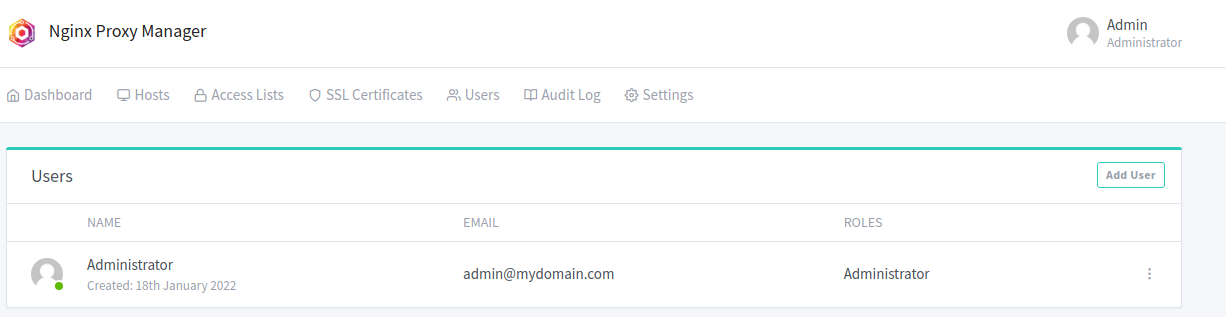
Where you can see yourself (the administrator), email address and role.
nginx-proxy-manager ACL's
Next - let’s create a user to authenticate when they visit pages on this VPS.
Click on ‘Access Lists’ at the top, it should look like this:
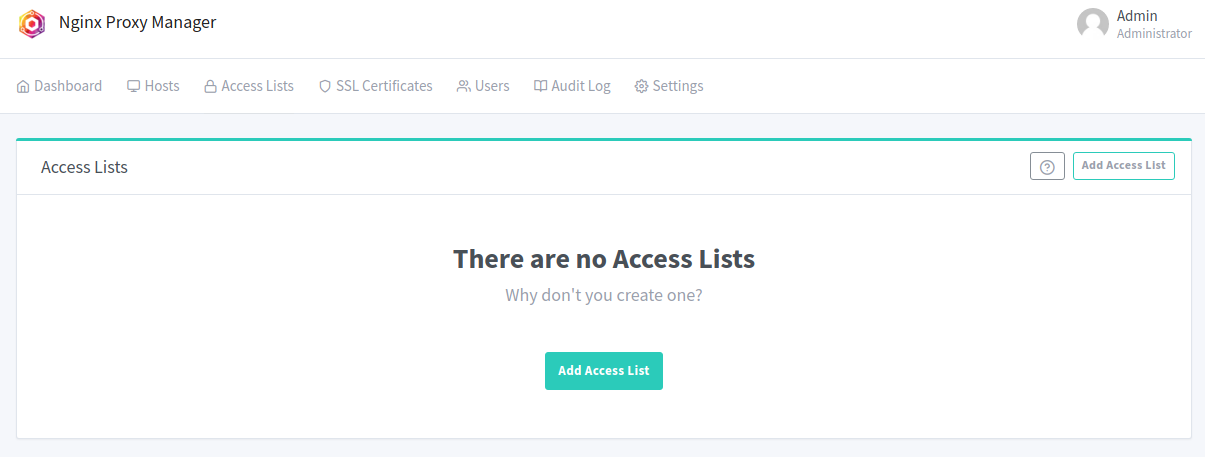
Click the ‘Add Access List’ button
Give your access list a name, such as ‘VPS VPN users’
- Enable the ‘Satisfy Any’ flag
- Do not enable ‘Pass Auth to Host’
- Now click on the ‘Authorization’ tab
Specify a user and a password and click ‘Save’

Click ‘Save’ again and we should get back to the ‘Access Lists’ tab looking like this:
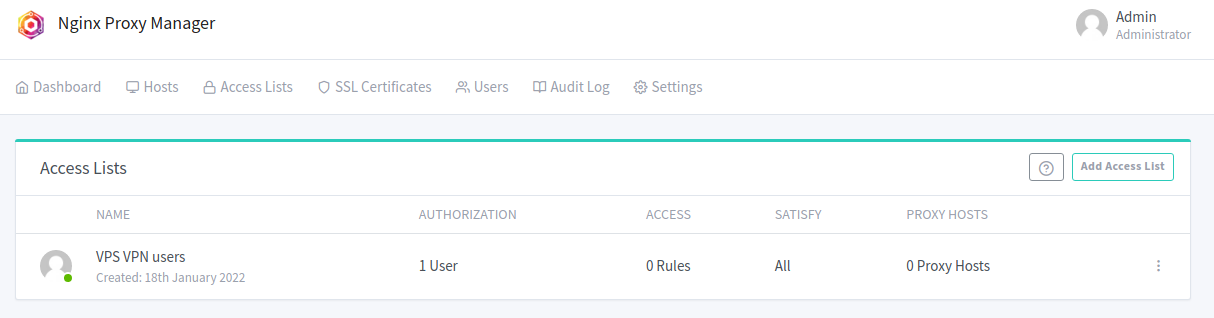
That’s it - lets move on!
Proxying GL.Inet GUI
Now we can finally do the first cool thing - make the gl.inet’s management interface available on the Internet through the VPS!
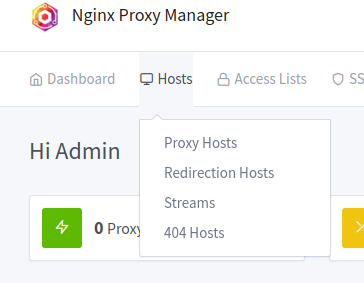
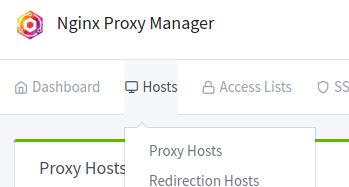
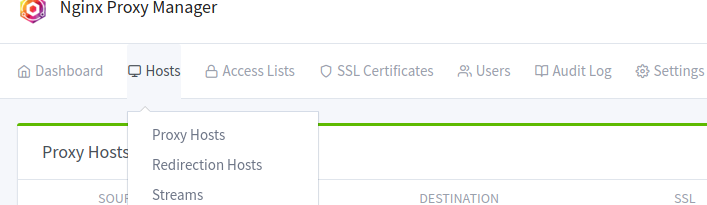
Click on Hosts->Proxy Hosts as pictured here:
At this point it should be empty like this:
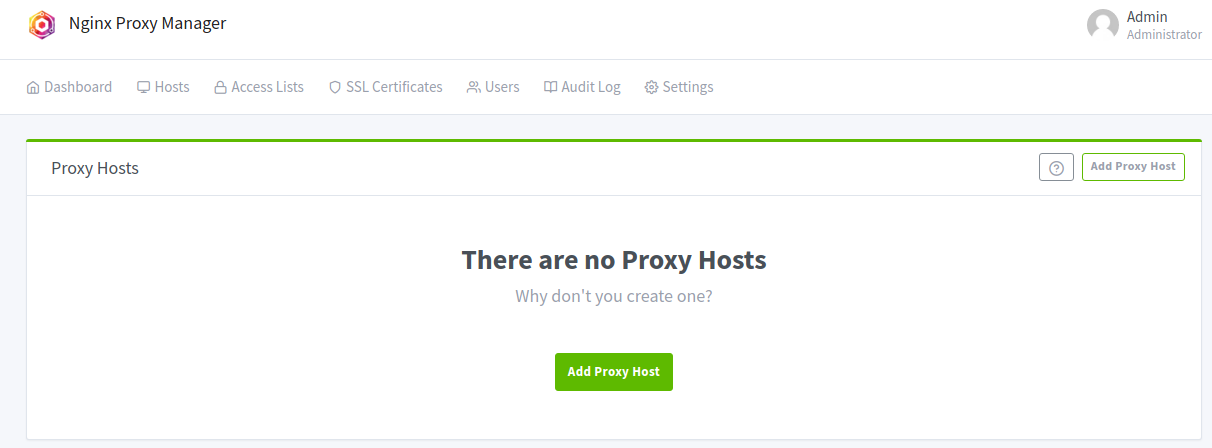
Now click ‘Add Proxy Host’
Fill it in to look like this:
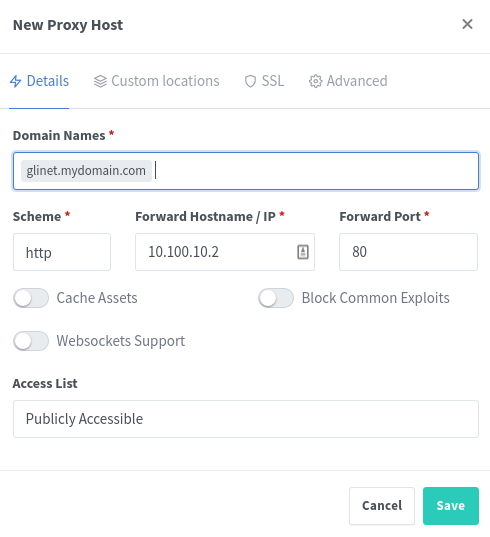
To explain each field:
- ‘Domain Names’ is the DNS name of the URL - in our example glinet.mydomain.com
- ‘Scheme’ can be http or https, we know that the gl.inet presents pages over http so choose ‘http’
- ‘Forward Hostname / IP’ - as we know from when we setup the GL.Inet’s VPN connectivity, it has the IP address of 10.100.10.2, so we type that
- ‘Forward Port’ - since this is ‘http’ traffic it is on port ‘80’, so we type that
- We leave ‘Access List’ to ‘Publicly Accessible’ as the Gl.Inet does its own authentication (when we setup the GL.Inet)
- Click ‘Save’ for now
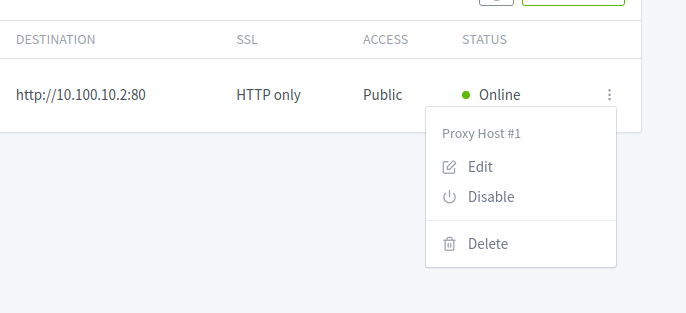
It should look like this:
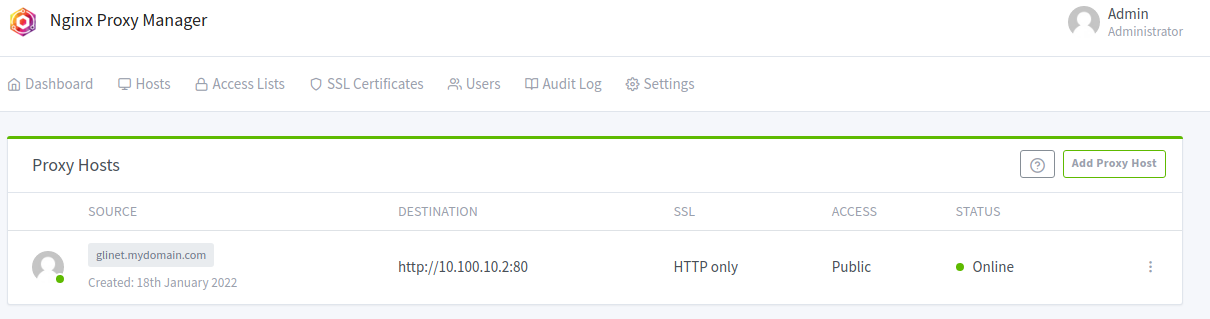
As you can see, we now have http://glinet.mydomain.com setup to forward to http://10.100.10.2:80 which is Public and shows as Online - which means that our nginx-proxy-manager can see the destination
Of course the next step is to browse to http://glinet.mydomain.com and make sure it works!
NOTE: Do not login!
If you made an error, the page will time out - go over the above and check that you did everything ok.
Now - let’s make this secure!
Go back to same screen and click the ‘menu’ button and choose ‘Edit’
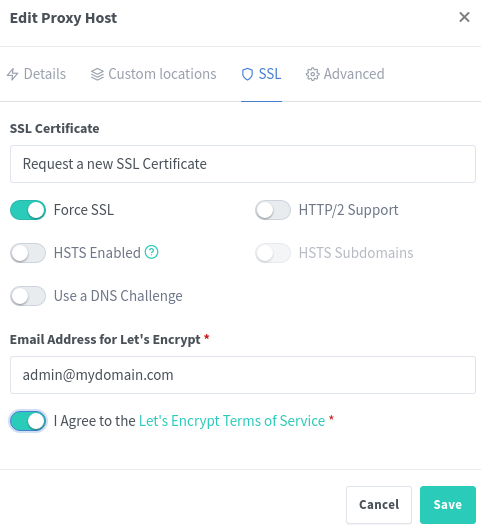
Now click on the ‘SSL’ tab and it should look like this:
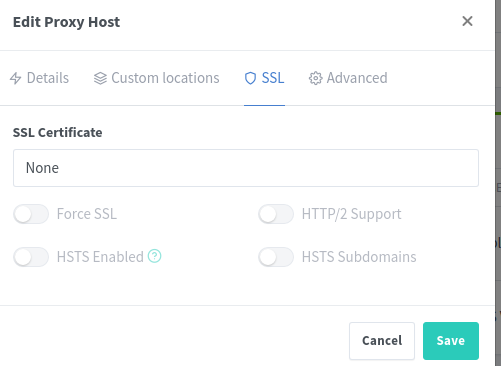
To explain each field:
- ‘SSL Certificate’ should be set to ‘Request a new SSL Certificate’ this is so nginx-proxy-manager can reach out to the certificate authority, verify your ownership of the name, and then issue a certificate for this name
- ‘Force SSL’ will ensure that traffic to the unsecure version of your site (http://glinet.mydomain.com) automatically get re-directed to the secure version (https://glinet.mydomain.com) to keep it secure
- ‘I Agree…’ is of course to agree to the TOS of Let’s Encrypt - who will be issueing your secure certificate
- Click ‘Save’
At this point, nginx-proxy-manager will reach out to the certificate authority (Let’s Encrypt), check, validate and issue the certificate, once done you can verify it by browsing to https://glinet.mydomain.com
Now you should notice the ‘padlock’ icon when browsing the site, and can therefore now authenticate with the GL.Inet, knowing that traffic is end-to-end encrypted
Well done, you have setup your first reverse proxy site!
Proxying a miner's web interface
Moving on to a real-world implementation.
Let’s say you have a new miner/rig/hotspot and you want to have its web interface exposed like you did with the GL.Inet above.
Firstly - of course plug in the miner onto the LAN port (or Wifi) of the GL.Inet.
Then, access your GL.Inet’s webUI and click on the ‘Clients’ tab, you should see something like this:
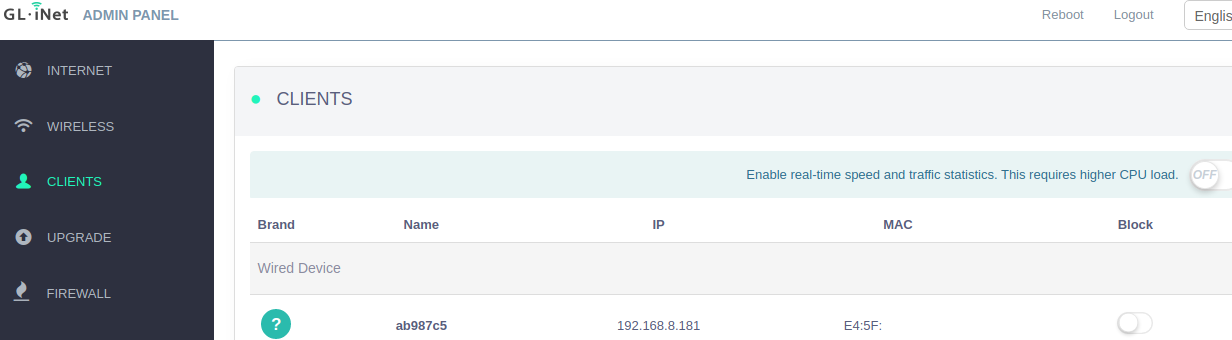
Make a note of the IP address and the ‘MAC’ address of the device
Setting a static lease
Next, we need to ensure that this device, with this particular MAC get the same IP address every time.
NOT doing this will cause the device to get a random IP and therefore break any of the traffic we send from the VPS to your device.
Now, let’s click on ‘More Settings’ and then ‘LAN IP’ you should see something like this:
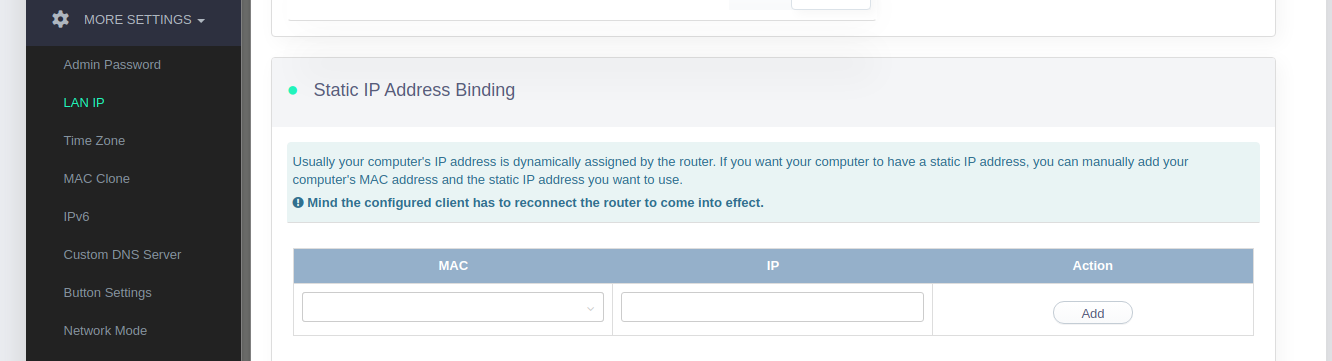
Type in the previously noted MAC and IP address of the miner you have plugged into the LAN port and click ‘Add’
In my example this is 192.168.8.181
Now that we know the IP address, we can setup nginx-proxy-manager to send traffic to it!
nginx-proxy-manager webgui proxy
Back on your nginx-proxy-manager Administration web interface, click on Hosts → Proxy Hosts → Add Proxy Host
Now, as before, we simply fill in the relevant information:
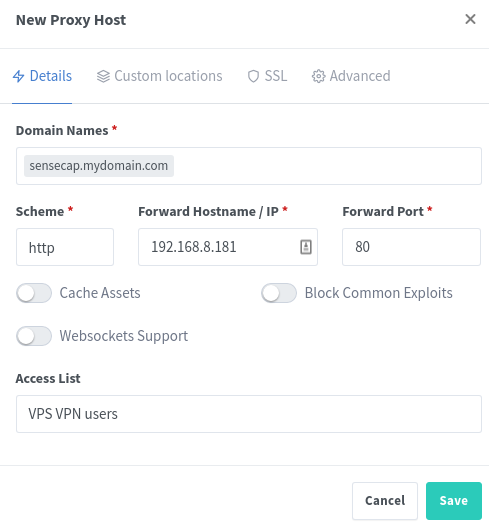
To explain each one:
- ‘Domain Names’ would be the DNS name / URL you would like to make this accessable on, I called mine sensecap.mydomain.com
- ‘Scheme’ again is ‘http’ as the Sensecap has a dashboard on http which is port 80
- ‘Forward Hostname / IP’ as we just saw on the GL.Inet, the miner had a IP address of 192.168.8.181 so we type this here
- ‘Forward Port’ again is port ‘80’ as that is the port exposed on the miner
- ‘Access List’ we change to our Access list we created on initial setup, so we choose that, since the miner does not authenticate users and we do not wish to have this particular interface exposed on the internet for everybody to see
- Click ‘Save’ to create this rule
You should now see this:
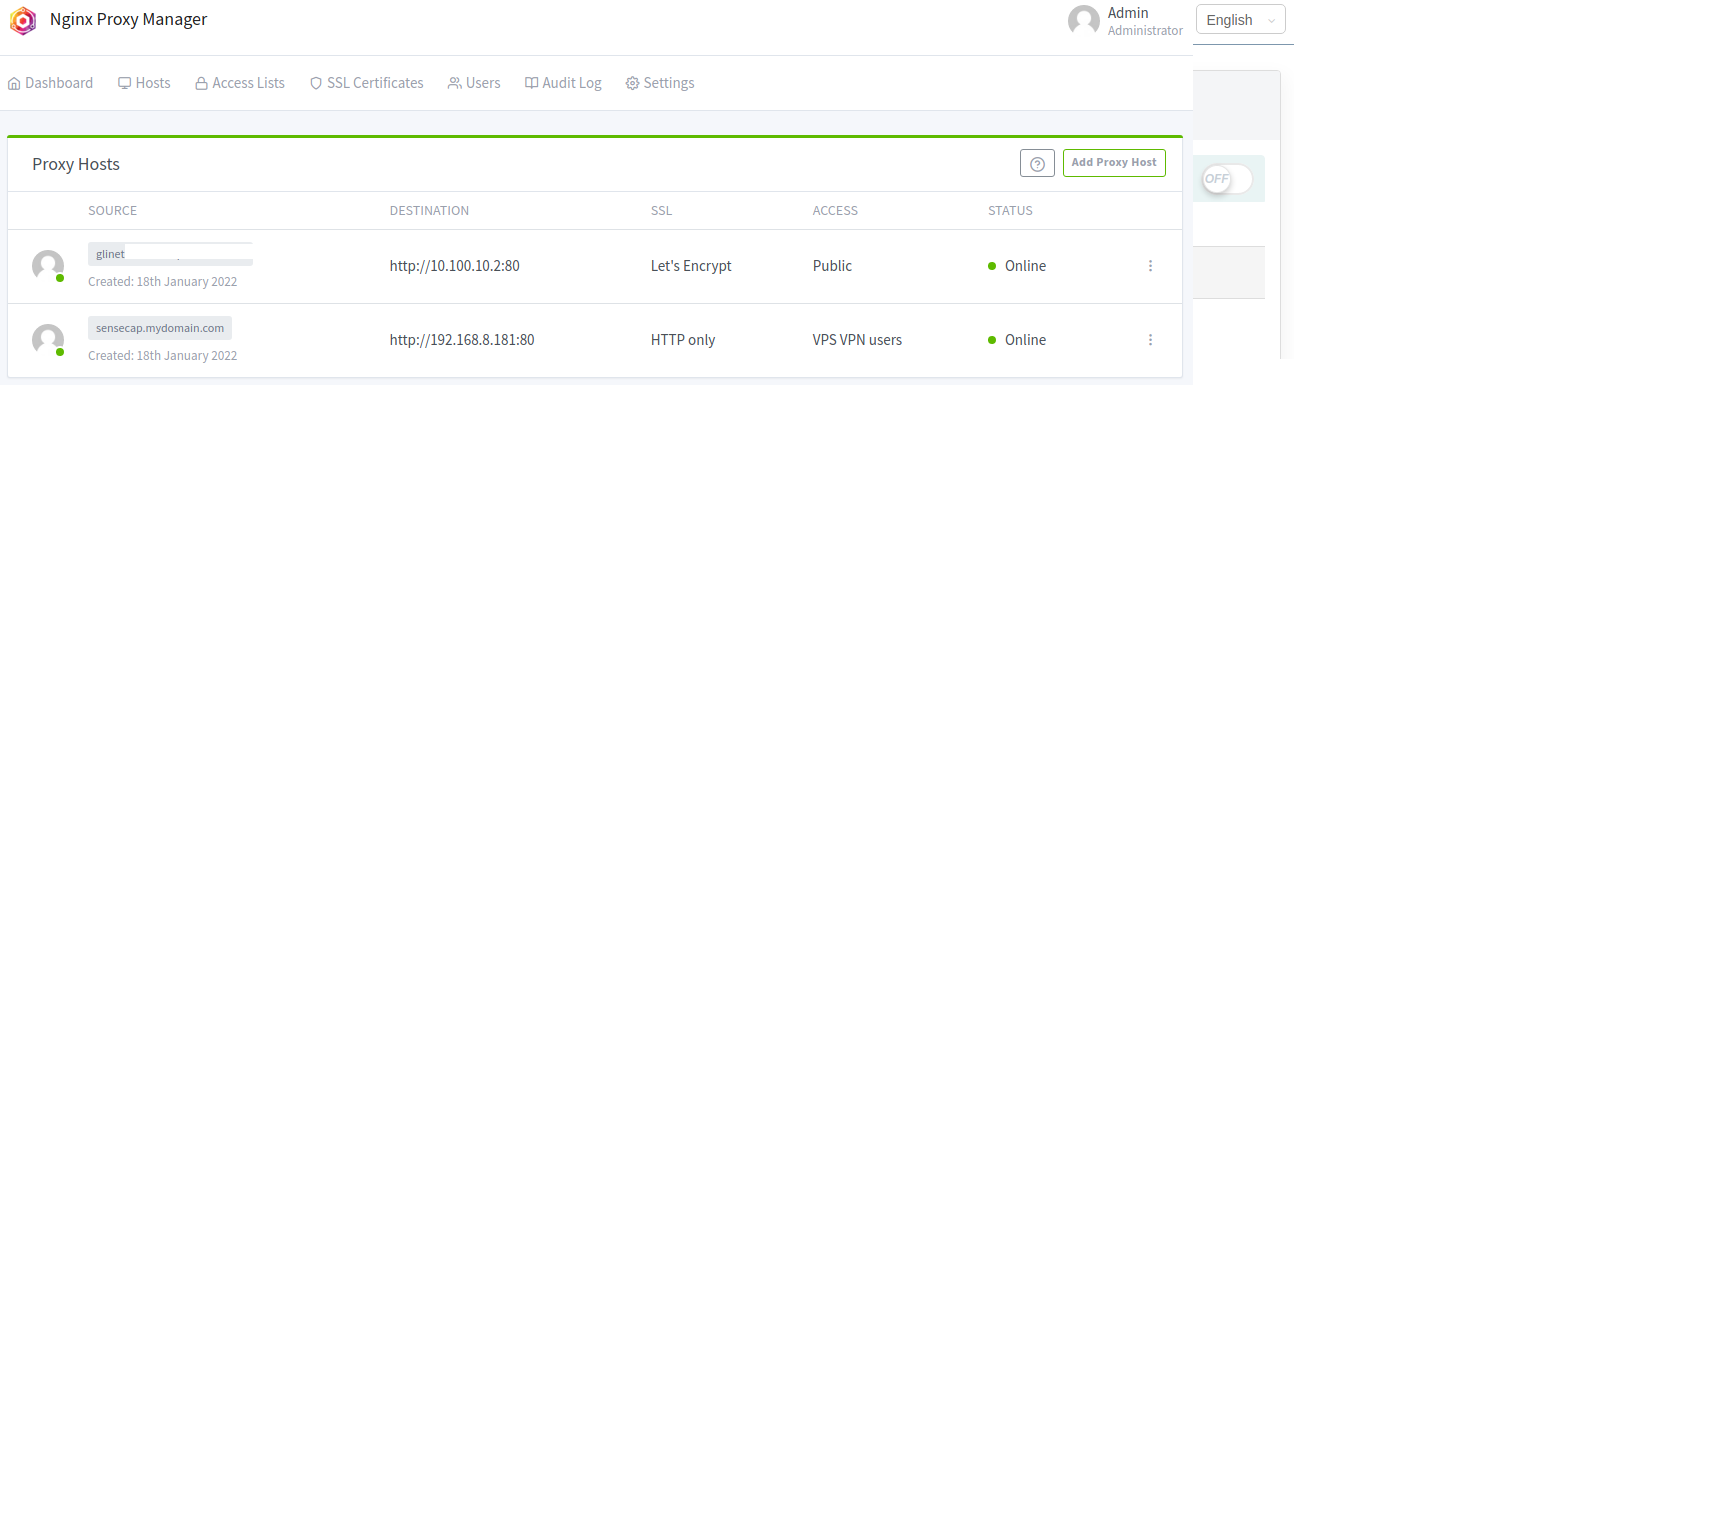
As you can see, we added the sensecap entry and it is going to 192.168.8.181 as we specified and it will authenticate using the access list we created, and we can see that nginx-proxy-manager does see this host as online!
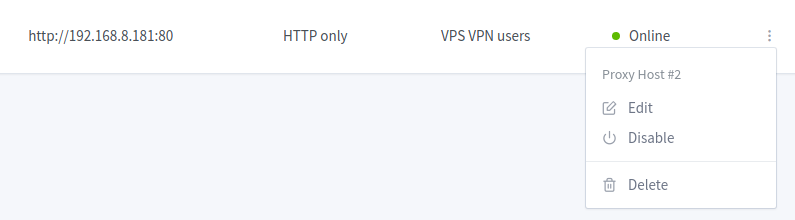
Next - we need make this interface secure, so again we click ‘Edit’ on out sensecap entry we created:
Click on the ‘SSL’ tab and choose the exact same information as last time
NOTE: Ensure you click ‘Request a new SSL certificate’ we will not re-use your glinet certificate as that would cause failures
Click ‘Save’ to proceed
Now let’s browse to http://sensecap.mydomain.com
It should automatically redirect to https://sensecap.mydomain.com and…like magic we see the login page
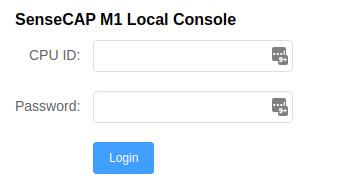
r
NOTE: We used ‘Access List’ for the above generation so this example is applicable to all cases, however in this particular example (of Sensecap) authentication is required anyway (CPU ID and Password) and therefore the ‘double authentication’ is probably not strictly necessary
Streaming a port (CG-NAT/LTE/etc)
Let’s use the same case above but assume we have a device which needs a particular port forwarded to the hosted device.
In this case, we want TCP port 44158 forwarded from our VPS to the Sensecap we have on 192.168.8.181 as per our example above, because our host is on a CG-NAT/LTE/Offgrid network
Stream configuration on nginx-proxy-manager)
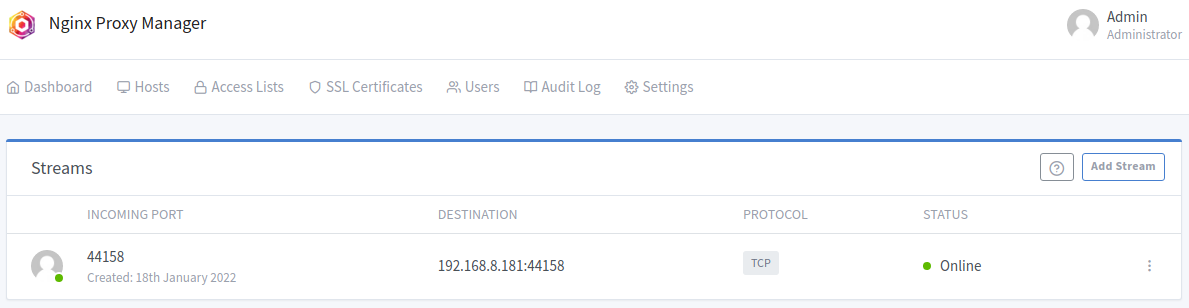
First, login to your nginx-proxy-manager administration interface, and go to Hosts → Streams
It should look like this:
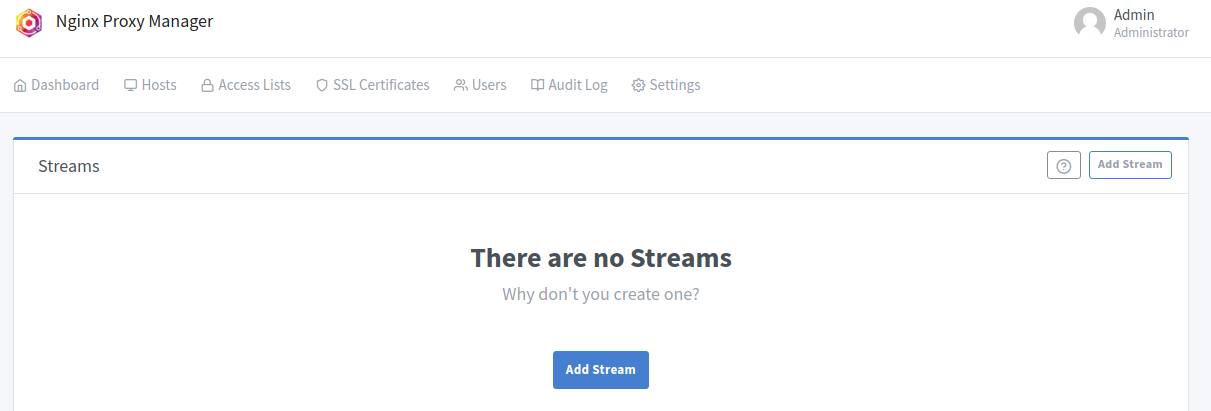
Now let’s click on ‘Add Stream’
Fill in the required details:
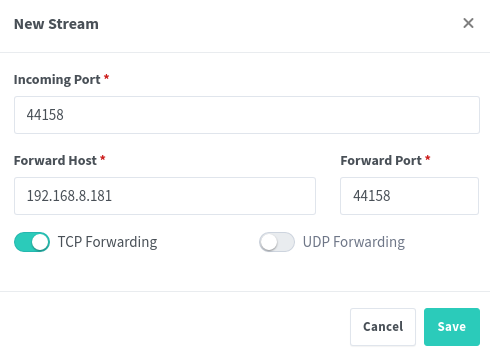
To explain each setting,
- ‘Incoming Port’ is the port we are waiting for traffic on, in our case 44158
- ‘Forward Host’ is where we are going to send this traffic to, of course this is our miner on 192.168.8.181
- ‘Forward Port’ is the port we are sending the traffic to on the forward host, so this is sstill 44158
- ‘TCP Forwarding’ needs to be enabled as this Helium’s port forwarding is TCP only
Click save and it should look like this:
Now, for security’s sake, when we intalled nging-proxy-manager with Docker we only gave access to the ports needed, so we need to quickly modify this configuration, edit the file /docker/docker-compose.yaml
Scroll down to the section that says:
    ports:
      - 80:80
      - 443:443
      - 9099:81 # Admin Web Port
And add the new last line:
    ports:
      - 80:80
      - 443:443
      - 9099:81 # Admin Web Port
      - 44158:44158 # 192.168.8.181:44158 port forward for Sensecap
Save and exit the file
Now let’s re-start nginx-proxy-manager with this configuration
# docker-compose -f /docker/docker-compose.yaml up -d nginx-proxy-manager
wireguard is up-to-date
Recreating nginx-proxy-manager ... done
#
And we’re done!
Let’s browse over to Open Port Check Tool - Test Port Forwarding on Your Router and test this:
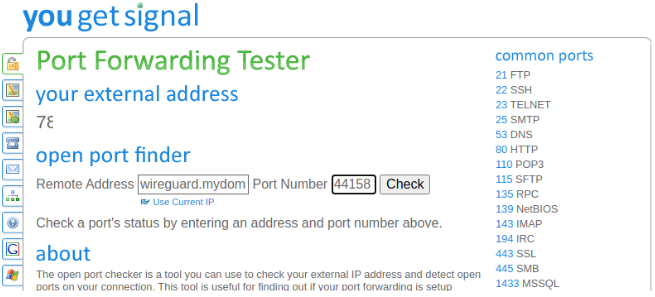
- Under ‘Remote Address’ fill in the domain name we used - in our example, wireguard.mydomain.com
- Under ‘Port Number’ we enter ‘44158’ as configured above
Click on ‘Check’ and it should come back saying that Port 44158 is open, confirming that all is well!
FAQ
Frequently asked Questions & Answers
How do I exclude a client from the VPN?
Let’s say you want to exclude a particular device plugged into the ‘LAN’ (of WiFi) side of the GL.Inet.
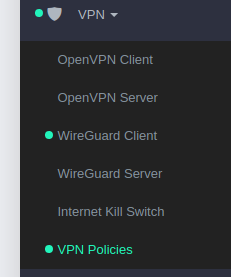
You can do this by setting up the relevant policy on the Gl.Inet device, simply browse to VPN → VPN Policies
NOTE: At least on Gl.Inet firmware 3.211 there is a bug present where 'Do not use VPN for the following ’ breaks on any VPN re-connection - therefore we need to invert our logic and use ‘Only allow the following use VPN’
Then set the buttons as shown below:
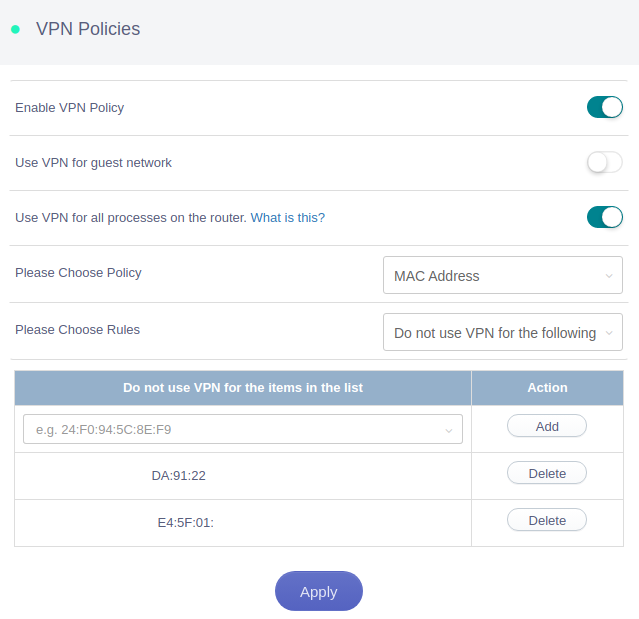
- And ensure you click on the relevant MAC address you want to include being routed through the VPN (and instead use your host’s Internet) instead
- Click Apply
A note about Helium
Many might get to this guide wondering about Helium and if they should use this or not. Here’s my thoughts.
If you have miners at several hosts
- You probably want to use your host’s Internet connection, which will lower latency
- You will have the capabilities to configure/reach the host’s router for configuration if needed remotely and be able to reach your miner’s dashboard if they have one
- Therefore - you should probably follow the ‘How do I exclude a client from the VPN?’ item above
If you have offgrid miners / miners on a LTE/CG-NAT connection
- You should consider if you WANT to appear to be relayed or not - not being relayed has a SIGNIFICANT impact on bandwidth use, and therefore might incur extra cost or throttling of the connection
- If you want to be relayed - you should exclude the MAC of the miner as mentioned above
- If you DO NOT want to be relayed, you should not take any action as the default is to route everything through the VPS - which in turn will ‘sort out’ the relay’d issue
If you have multiple miners in one location
- Then you are a bad boy, go away!
I want pingboot?
Or reboot-on-no-ping, etc.
Relatively simple, SSH to the router, make a file in /root called pingboot.sh and make it look something like this:
#!/bin/sh
#

dest=8.8.8.8

ping -c1 -W120 $dest >/dev/null 2>/dev/null
RC=$?

if [ $RC != 0 ] ; then
        echo Ping failed, rebooting
        /sbin/reboot
else
        echo Ping to $dest OK
fi
Mark the file as excutable:
chmod +x /root/pingboot.sh
Now run:
crontab -e
And insert:
*/15 * * * * /root/pingboot.sh
Which means it will run the script every 15 minutes.
This is too complex!
Appreciate the instructions and need help in doing it? Give me a shout on Discord and we can sort something out.
Happy customers incl:
– 619OTA
– Phayu94
– WeMountHotspots