A few people have asked how to modify the BIOS of an RX 5700 to achieve 55-60 MH/s so the process is described below. I have no affiliation with the creator of these tools or the website where I got them so use caution as always. The BIOS modding must be done in Windows so Linux users will need to create the BIOS file on another computer or temporarily install Windows.
WARNING!! This could result in a bricked GPU. Do this at your own risk. I have done it about 80 times so far without a problem but that doesn’t mean things can’t go wrong.
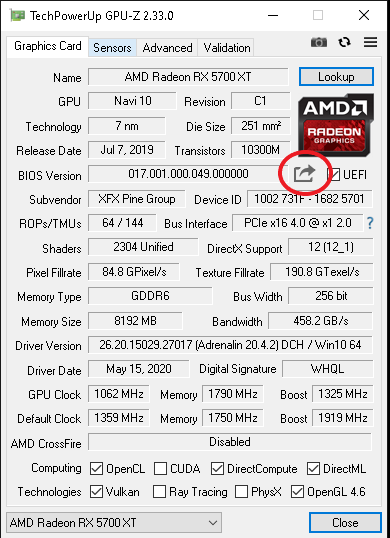
STEP 1: Save your GPU’s BIOS using GPU-Z. Click on the black arrow circled below and save the BIOS file to a safe location. Give it an obvious name like Stock 5700 BIOS. You can also start with an XT BIOS from another GPU. Most will work with your GPU but I recommend using an XT BIOS from the same manufacturer and for the same card if possible. For example, if you have an XFX reference card, use the XT version of the XFX reference card. The TechPowerUp VGA BIOS collection can be helpful if you can’t easily get one from the manufacturer. There is no mining performance difference between the XT and non-XT BIOS so your safest option is to modify your current BIOS.
STEP 2: Create a custom PowerPlay Table using More Power Tool. This step is optional but necessary to achieve lower voltage settings. The stock 5700 minimum is 800mV. The stock 5700 XT minimum is 750mV. If power management below stock settings is not a concern, you can skip to Step 3.
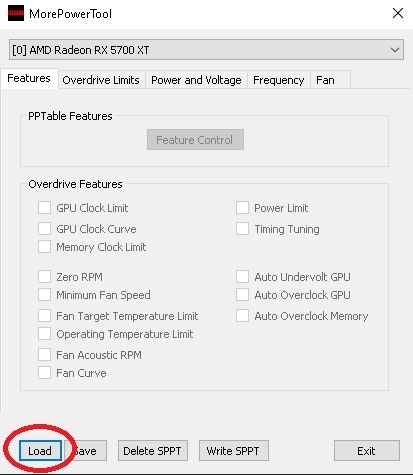
Open More Power Tool and select one of your GPUs in the dropdown menu then hit the load button and open the BIOS you saved in Step 1 or the BIOS you downloaded if you chose to use an XT version on your non-XT GPU.
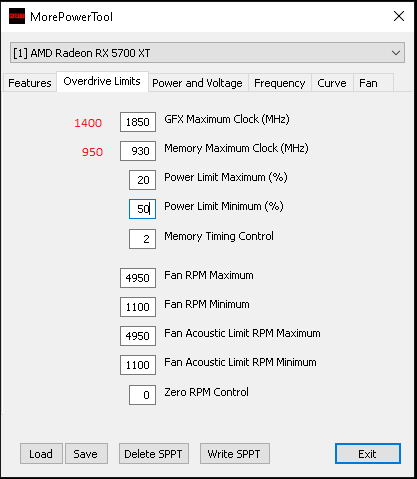
Navigate to the Overdrive Limits tab. If you only mine Ethash, change the GFX Maximum Clock and Memory Maximum Clock. This prevents the GPU from running full blast if your drivers or overclocking software fail and it increases the upper limit for overclocking the memory. Don’t change these values if you switch to other algorithms or play games with your GPU. The values I use for Ethash are shown in red for reference.
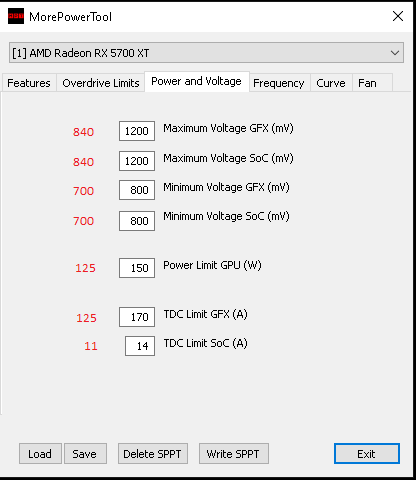
Navigate to the Power and Voltage tab. Here you can change the minimum and maximum allowable voltages so you will maintain your undervolt even if drivers or overclocking software fail. You can also cap the power usage of the GPU here. I recommend changing the minimum voltages at the very least. The values I use are shown in red for reference.
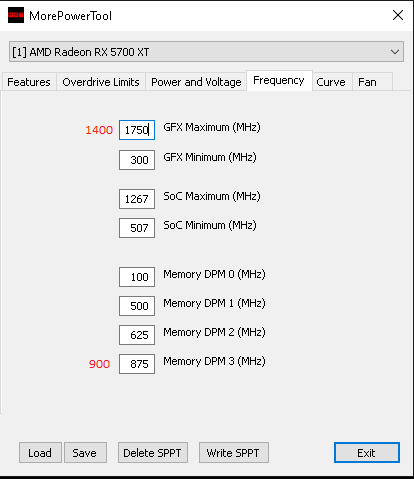
Navigate to the Frequency tab. Here you should set the Maximum Frequency to match the value you used in the Overdrive Limits tab. You can also change the Memory DPM 3 frequency so that the memory always maintains a minimum overclock. I set this to a conservative frequency so if the drivers fail, I still get a decent hashrate until it is discovered. This is a rare occurence but it can happen.
You can also make changes to the fan control but I don’t usually do that except in the case of GPUs with 0 RPM fan control. Some GPUs don’t respond to just disabling it so I end up setting the start and stop temperatures to 20 and 25 C so they never turn off once the card gets past 20 C. Once you have made all of the changes, hit the save button and save the .mpt file for use in the next step.
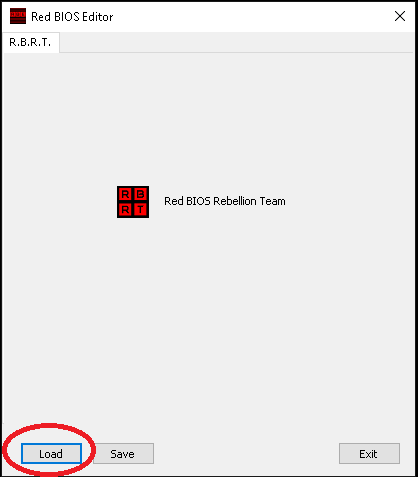
STEP 3: Create a modified BIOS using Red BIOS Editor. Open Red BIOS Editor and load the BIOS you will be modifying.
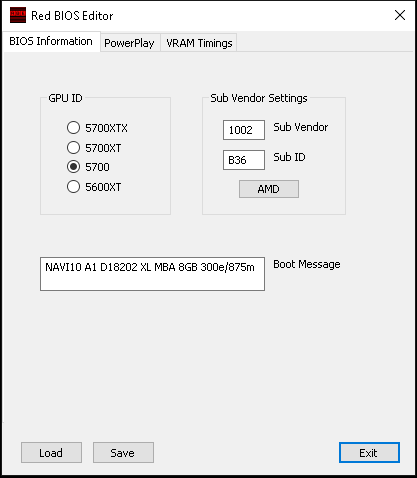
Select the type of BIOS you are modifying and navigate to the PowerPlay tab.
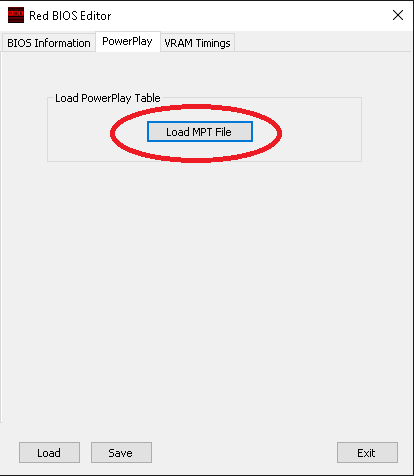
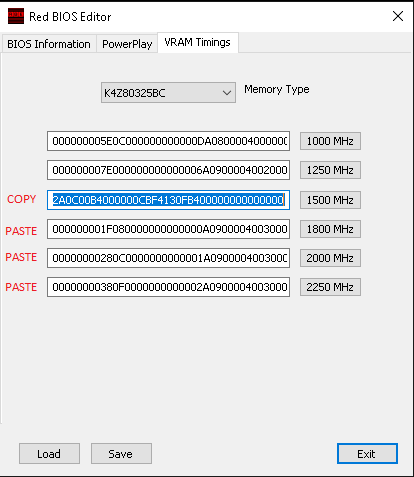
On the PowerPlay tab, click on the Load MPT File button and select the .mpt file that you saved in Step 2. Once loaded or, if you chose not to use one, navigate to the VRAM Timings tab.
On the VRAM Timings tab, copy the 1500 MHz timings into all of the higher timings and then save the BIOS file. Be careful not to save over your original BIOS.
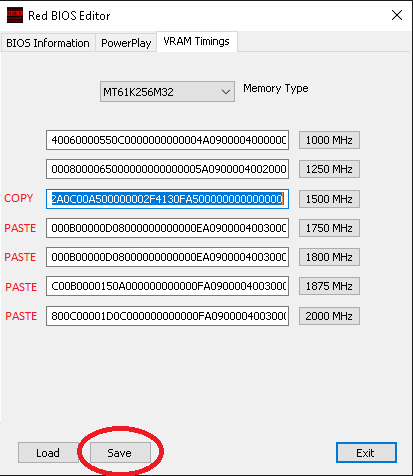
Now, select the second memory type from the dropdown list and copy the 1500 MHz timings into all of the higher timing like before. Save the BIOS file again (just replace the file you just created). If you modify both memory types before saving, only the last one you entered will save. There seems to be a bug in the software which is the reason for saving the file twice.
STEP 4: Remove AMD drivers using DDU. Startup in safe mode and then run DDU to remove all AMD drivers using the clean and restart option. This step can be done either before or after flashing the GPUs. If done after, sometimes the AMD drivers will crash the system before you are able to reboot in safe mode so I recommend doing it before you flash.
STEP 5: Flash the BIOS to the GPU. To flash the modded BIOS, you will need a modified version of the ATI flash tool that can be downloaded from the links below along with the other software mentioned above.
More Power Tool, Red BIOS editor, and Modified Flash Tool https://www.igorslab.de/en/red-bios-editor-and-morepowertool-adjust-and-optimize-your-vbios-and-even-more-stable-overclocking-navi-unlimited/3/
GPU-Z https://www.techpowerup.com/download/techpowerup-gpu-z/
DDU https://www.wagnardsoft.com/forums/viewtopic.php?f=5&t=3202
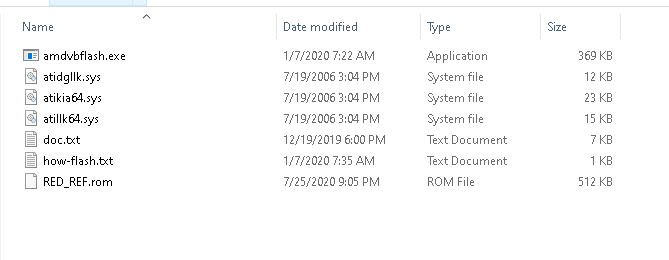
Place your modified BIOS file in the same folder as the flash tool
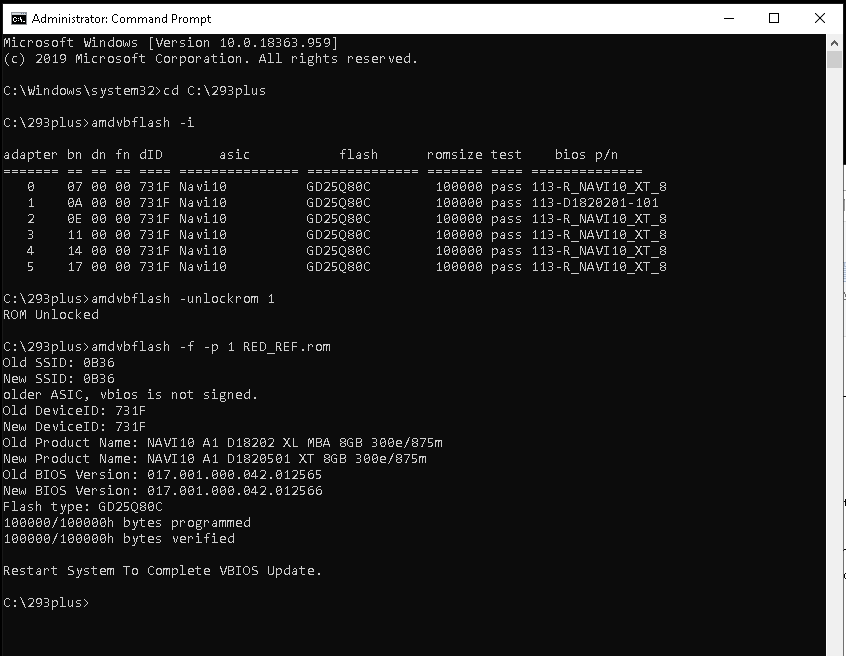
Open the command prompt as the administrator. If you do not run as administrator, it will not allow you to flash the GPU. Then you need to determine which GPU you need to flash by entering the following:
cd (directory of ATI Flash Tool)
amdvbflash -i
This just lists the installed GPUs so you can easily determine which GPU number to flash. In this example, it is GPU 1 by looking at the BIOS p/n. Once the GPU assignment is known, type the following and hit enter.
amdvbflash -unlockrom yourGPUnumber
Once the GPU has been unlocked, type the following, hit enter and wait patiently. Don’t touch anything or interrupt power until it is done and prompts you to restart. The BIOS name in the example is RED_REF.rom
amdvbflash -f -p yourGPUnumber yourBIOSname.rom
If the rest of your GPUs are the same, just repeat Step 5. You can flash them all without having to restart after each. Once you restart your rig, use whatever overclocking software you normally use to tune your GPUs to your liking. To get increased speeds, you will need to set the core between 1300-1350 MHz with as high of a memory overclock as your cards can handle. I run the voltage around 745 mV at 1325 MHz but some GPUs may require higher voltages or you could possibly use lower.