Before you follow this guide, IMO dappnode is a much better way to go. Here’s a guide on that. https://theethernaut.substack.com/p/running-an-eth-2-validator
HOWTO setup a Prysm, Ethereum 2.0 client on the Topaz testnet using Docker on existing hardware.
Prerequisites
- Docker 19.x
- 32 GöETH (testnet ETH of no value)
- Metamask connected to Görli
If you’re on Windows, wherever you see $HOME, replace with a path to the location you would like to store the testnet files, for example instead of $HOME/.eth2:/data use c:/prysm/eth2:/data
Guide
- Install Docker 19.x following this guide Install Docker Engine | Docker Documentation
Add your user to the docker usergroup
sudo adduser $USER docker
Re-login for new permissions to take effect.
- Download the required Docker images. The Beacon Chain is the Ethereum 2.0 testnet, ‘Topaz’. Think of the validator as the miner that validates PoS blocks on ETH2 instead of mining them on ETH1.x, each validator is a worker or a rig.
docker pull gcr.io/prysmaticlabs/prysm/validator:latest
docker pull gcr.io/prysmaticlabs/prysm/beacon-chain:latest
-
On your firewall, open up ports tcp/13000 and udp/12000.
-
Start the Docker container for the beacon chain.
docker run -d --rm -v $HOME/.eth2:/data -p 4000:4000 -p 13000:13000 -p 12000:12000/udp --name beacon-node gcr.io/prysmaticlabs/prysm/beacon-chain:latest --datadir=/data --p2p-host-ip=$(curl -s ident.me)
If you didn’t open the ports in step #3 you can skip —p2p-host-ip=$(curl -s ident.me), You can also enter your IP address instead of having bash look it up —p2p-host-ip=<my public ip> if you do not have curl installed or if you’re on Windows
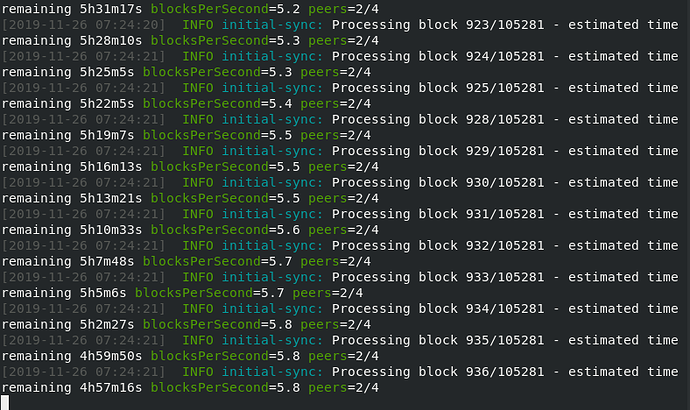
- You can watch the beacon chain download in the Docker logs. You need to wait for the chain to download before continuing.
docker logs -f beacon-node
The -f flag ‘follows’ the log, ctrl+c to stop following the log, this doesn’t stop the container. You can also run the logs command without the -f to see a snapshot without following.
If you need stop the node at any point
docker stop beacon-node
Start it back up again with the command in step 3.
-
You are now running Ethereum 2.0, Phase 0. Next we setup a validator, you can setup one or many, each validator requires a 32 ETH stake deposited to a validator deposit contract before the validator can be activated.
Go to Prylabs, skip step 1, in step 2 be sure to switch Metamask to Görli before connecting, if you do not have 32 GöETH in your wallet, you will be given the option to receive it from Prysm’s faucet.
-
Generate a validator keypair, as well as deposit data to submit on the Prylabs page.
docker run -it -v $HOME/.eth2:/data \
gcr.io/prysmaticlabs/prysm/validator:latest \
accounts create --keystore-path=/data --password=changeme
This command will output a Raw Transaction Data block:
-
Copy and paste the deposit data into the field in step 3 Prylabs
-
The beacon node must be completely synced before attempting to initialize a validator client, otherwise the validator will not be able to complete the deposit and funds will be lost.
-
Start a validator client.
docker run -d --rm -v $HOME/.eth2:/data --network="host gcr.io/prysmaticlabs/prysm/validator:latest --beacon-rpc-provider=127.0.0.1:4000 --keystore-path=/data --password=changeme
If you need stop the node at any point
docker stop validator
Start it back up again with the command in step 3.
- Once both the beacon node and validator client are running, make your deposit by clicking the button in step 5 on Prylabs and following the steps presented in your wallet.


